Nozbe Business
Nozbe Business Plan
Nozbe Business plan is our solution for those companies that want to make the most of Nozbe’s multiple spaces feature.
While Nozbe Premium requires purchasing a separate subscription for each of the spaces you own, Nozbe Business allows you to have one subscription for the total number of your business members, and then assign them to multiple spaces at no extra cost.
In Nozbe Business, you pay a unified price for the total number of people in your team, no matter how many spaces they belong to. This way, you can create a separate space for each of your company’s divisions and departments and assign members to these spaces - without having to pay multiple times for the same person in different spaces.
Business users receive priority email support from our friendly customer support, as well as dedicated account manager and training.
Apart from that, the Business plan also includes unlimited storage for attachments and the possibility to assign an unlimited number of admins in your spaces.
Purchasing the Business plan
To purchase the Nozbe Business plan subscription, hit the gear icon, then choose “Upgrade” and switch the plan to Business. Pick the number of users you want to have in your team and confirm to proceed with the payment.
Your plan will be automatically changed to Business, and the current space will be assigned to that business.
For more information about the Business plan prices, please visit our pricing.
This plan can only be purchased via our payments system. It’s not possible to buy Nozbe Business using Apple or Google in-app payments.
Upgrading from Premium to Business
If you already own the Nozbe Premium subscription, you can upgrade your plan to Business.
To do this, hit the gear icon and choose “Change plan”. Switch the plan to Business, select the number of users you want to have in your team and confirm.
Your plan will be automatically changed to Business, and the current space will be assigned to that business.
Changing plans is free. The system will automatically recalculate the unused time from your previous subscription and adjust the expiration date of the new subscription.
What if I already have more than one Premium space on my account?
After you upgrade one of your spaces to the Business plan, you can add other spaces to it, too. You must be the owner of the space to add it to the business.
To do it, click the “Manage” button on the spaces list, then click on the name of your business. Choose “Spaces” → “Add spaces”, select one from the list and confirm.

The unused time from your Premium subscription will be recalculated and the system will add additional time to the expiration date of your Business subscription.
Payment history and invoices
You check your payment history and download invoices for your payments directly in the app. Click the “Manage” button on the spaces list, then click on the name of your business. go to the “Payments history” tab to find a list of all your payments:
Only the business owner can access that view. Admins and members can’t check the payments history.
If you need to update the invoice or add any data there, please contact Nozbe Customer Support. We’ll be happy to assist.
Additional email address for invoices
As the business owner, by default only you have access to invoices for your payments. If you’d like Nozbe to send a copy of each new invoice issued to someone else - for example, your bookkeeping department - you can set an additional email address that will receive invoices for the payments you make.
To do this, click the “Manage” button on the spaces list, then click on the name of your business. Now go to the “Payments history” tab. In the “Send invoices to” section, hit the “Change” button and provide the email address of the person who should be receiving copies of the future invoices.

Once set, Nozbe will send a copy of each new invoice issued to that address. You can change that address anytime by hitting the “Change” button, or remove it using the “Remove” button.
Additional people in your Business
If your team grows, you can upgrade your Business plan to add more people. You can do it in a few clicks, without having to make any additional payments.
To do this, hit the “Manage” button in the spaces list and select the name of your business. In the “General” tab, find the “Current plan” section, then hit the “Change” button. Select the plan that fits you best and confirm the change.

Our payment system will recalculate the unused funds from your previous subscription and add this time to the validity of your newly chosen subscription.
Only the business owner can make that change.
Roles in Business
There are three roles for people belonging to a business: business owner, business admin and business member.
Business owner - can change, extend or cancel the Business subscription, as well as access the invoice. The business owner can also change the business name and color, create and assign new spaces to the business as well as remove them from the business, or join existing spaces assigned to a business. They can also promote other users to admins or demote them. There can only be one business owner.
Business admin - can change the business name and color, create and assign new spaces to the business as well as remove them from the business, or join existing spaces assigned to a business. The business owner can assign multiple business admins. When added to a space, business admins will automatically become space admins.
Business member - can be invited to spaces or removed from them.
How to promote someone to a business admin
As the business owner, you can promote someone to be a business admin by hitting the “Manage” button on the spaces list, then clicking the name of your business. Go to the “Members” tab. Click on the person you’d like to grant admin rights to, choose “Promote to admin” and confirm.
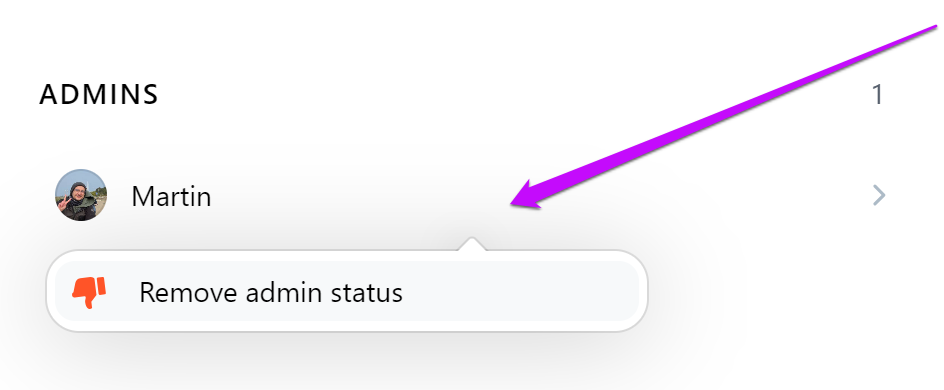
In this view, you can also demote that person. Click their name and choose “Remove admin status”.
Creating spaces
There are two ways you can create a space in Nozbe. The first option allows you to create a space and automatically assign it to your business. The second one lets you create a separate space without assigning it to your business.
Creating a space that is automatically assigned to your business
To create a new space and assign it to your business automatically, click the “Manage” button on the spaces list, then clicking the name of your business. Go to the “Spaces” tab and choose “Create new space”. Use the “Create a new space” option to add a space that you will be inviting others to, or use “Create a personal space” if you just want to add a space for yourself.
Enter your space’s name and upload an avatar for it (optional). You can also select business members to add to this space while creating it.
The space you create that way will be automatically assigned to your business.
Creating a space without assigning it to your business
To create a new space without assigning it to your business, hit the “Manage” button on the spaces list and hit “Add a space”. Use “Create a new space” to add a space that you will be inviting others to, or use “Create a personal space” if you just want to add a space for yourself.
Enter your space’s name, upload an avatar for it (optional) and confirm to add that space.
Any new space you create here won’t be automatically assigned to your business. It’s plan will be set to Free or Premium Trial (if you already already have an existing team on the Free plan). If you’d like to link such space to your Business subscription, you will need to assign it in your business' settings.
Assigning spaces to your business
To assign an existing space to your business, hit the “Manage” button on the spaces list, then click on the name of your business. Choose “Spaces” → “Add spaces”, select the space you want to add to your business from the list and confirm.
You can also assign a space to a business directly from that space’s settings. To do this, open that space, hit the gear icon and choose “Space settings for [Space name]”. In the “General” tab, choose “Move to business” and select the business you want to add this space to from the list. Confirm your choice.
Here you can also change the business your space belongs to. Choose “Move to business” and select the correct business from the list.
Once done, this space will be assigned to your business. When a space is assigned to a business, you will see a dot in a chosen color next to its avatar on the spaces list. You can change the color of that dot by going to “Manage” → [Name of your Business] → “Color” and pick a new color.
Managing space members
When your space is assigned to your business, you can manage its members.
To invite someone to a space, hit the “Manage” button on the spaces list, then click on the name of the chosen space and open the “Members” tab.
Here you can manage the space members list:
- See the list of people invited to that space,
- Promote a chosen space member to a space admin (or demote them),
- Change the groups that this user belongs to,
- Remove selected member from that space.
Inviting members to a space
In the “Members” tab you can also add new people to that space:
- Invite a new member to that space - use it if the person you want to add isn’t a member of any of the spaces belonging to your business yet,
- Select new members from your business - use it if that person has already been added to one of the spaces belonging to your business.
You can also invite new people to your space by opening that space’s sidebar and choosing “Space members”.
Any person you invite to your space will become a member of your business team.
One business member can belong to multiple spaces. The main benefit of the Business plan is that you can invite the same people to multiple spaces at no extra cost.
Exceeding the number of business members
If the person you are adding to a space hasn’t been invited to any of your spaces belonging to that business yet, they will automatically be added as your business team member and counted in the total number of business members.
If adding that person exceeds the limit of people on your Business plan, your plan will be automatically changed to a higher one. Our system will recalculate the funds left from your previous subscription and adjust the subscription’s validity date accordingly.
Removing members from a space
To remove someone from your space, click on their name of the space’s members list, then select “Remove from space”. Confirm your choice.
For more detailed information about spaces, please visit our help page article about spaces.


