Outlook Calendar Integration
How to connect Outlook Calendar with Nozbe
To synchronize Nozbe with Outlook Calendar, click the gear icon → Settings → Calendars → Outlook Calendar. Hit the “Enable” button to enable the integration.
You will be asked to log in to your Microsoft account in the next step. Once you’re logged in, you will be asked to grant Nozbe access to your calendar info. Hit “Yes” to enable the integration.
And that’s it!
How does it work?
Nozbe creates a separate sub-calendar in your Outlook Calendar, named “Nozbe - [name of a space]”. You can enable the Outlook Calendar integration for each space you own or belong to.
Outlook Calendar will not automatically display the sub-calendar after the integration. To see it, enable it in the “My Calendars” list in your Outlook Calendar.
All tasks assigned to you and with due dates (within active projects) will appear in Outlook Calendar. The event in Outlook Calendar will have the task’s name. In its description, you will find a link to that task.
You can also add new events to this sub-calendar, and they will be synchronized as new tasks in your Nozbe. The first comment to a task created that way will contain a description of that event in Outlook, as well as a link to it.
Events added in other sub-calendars won’t be synchronized to Nozbe.
When you finish a task in Nozbe, the Outlook Calendar event will receive a checkmark character. Restoring the task will remove the mark in Outlook Calendar too.
If you change a due date in Nozbe, it will be synced with your Outlook Calendar.
When someone assigns you a task with a due date, it will also show up in Outlook Calendar.
Additional settings
Once you enable the integration, you can adjust what events you’d like to see in your Outlook Calendar.
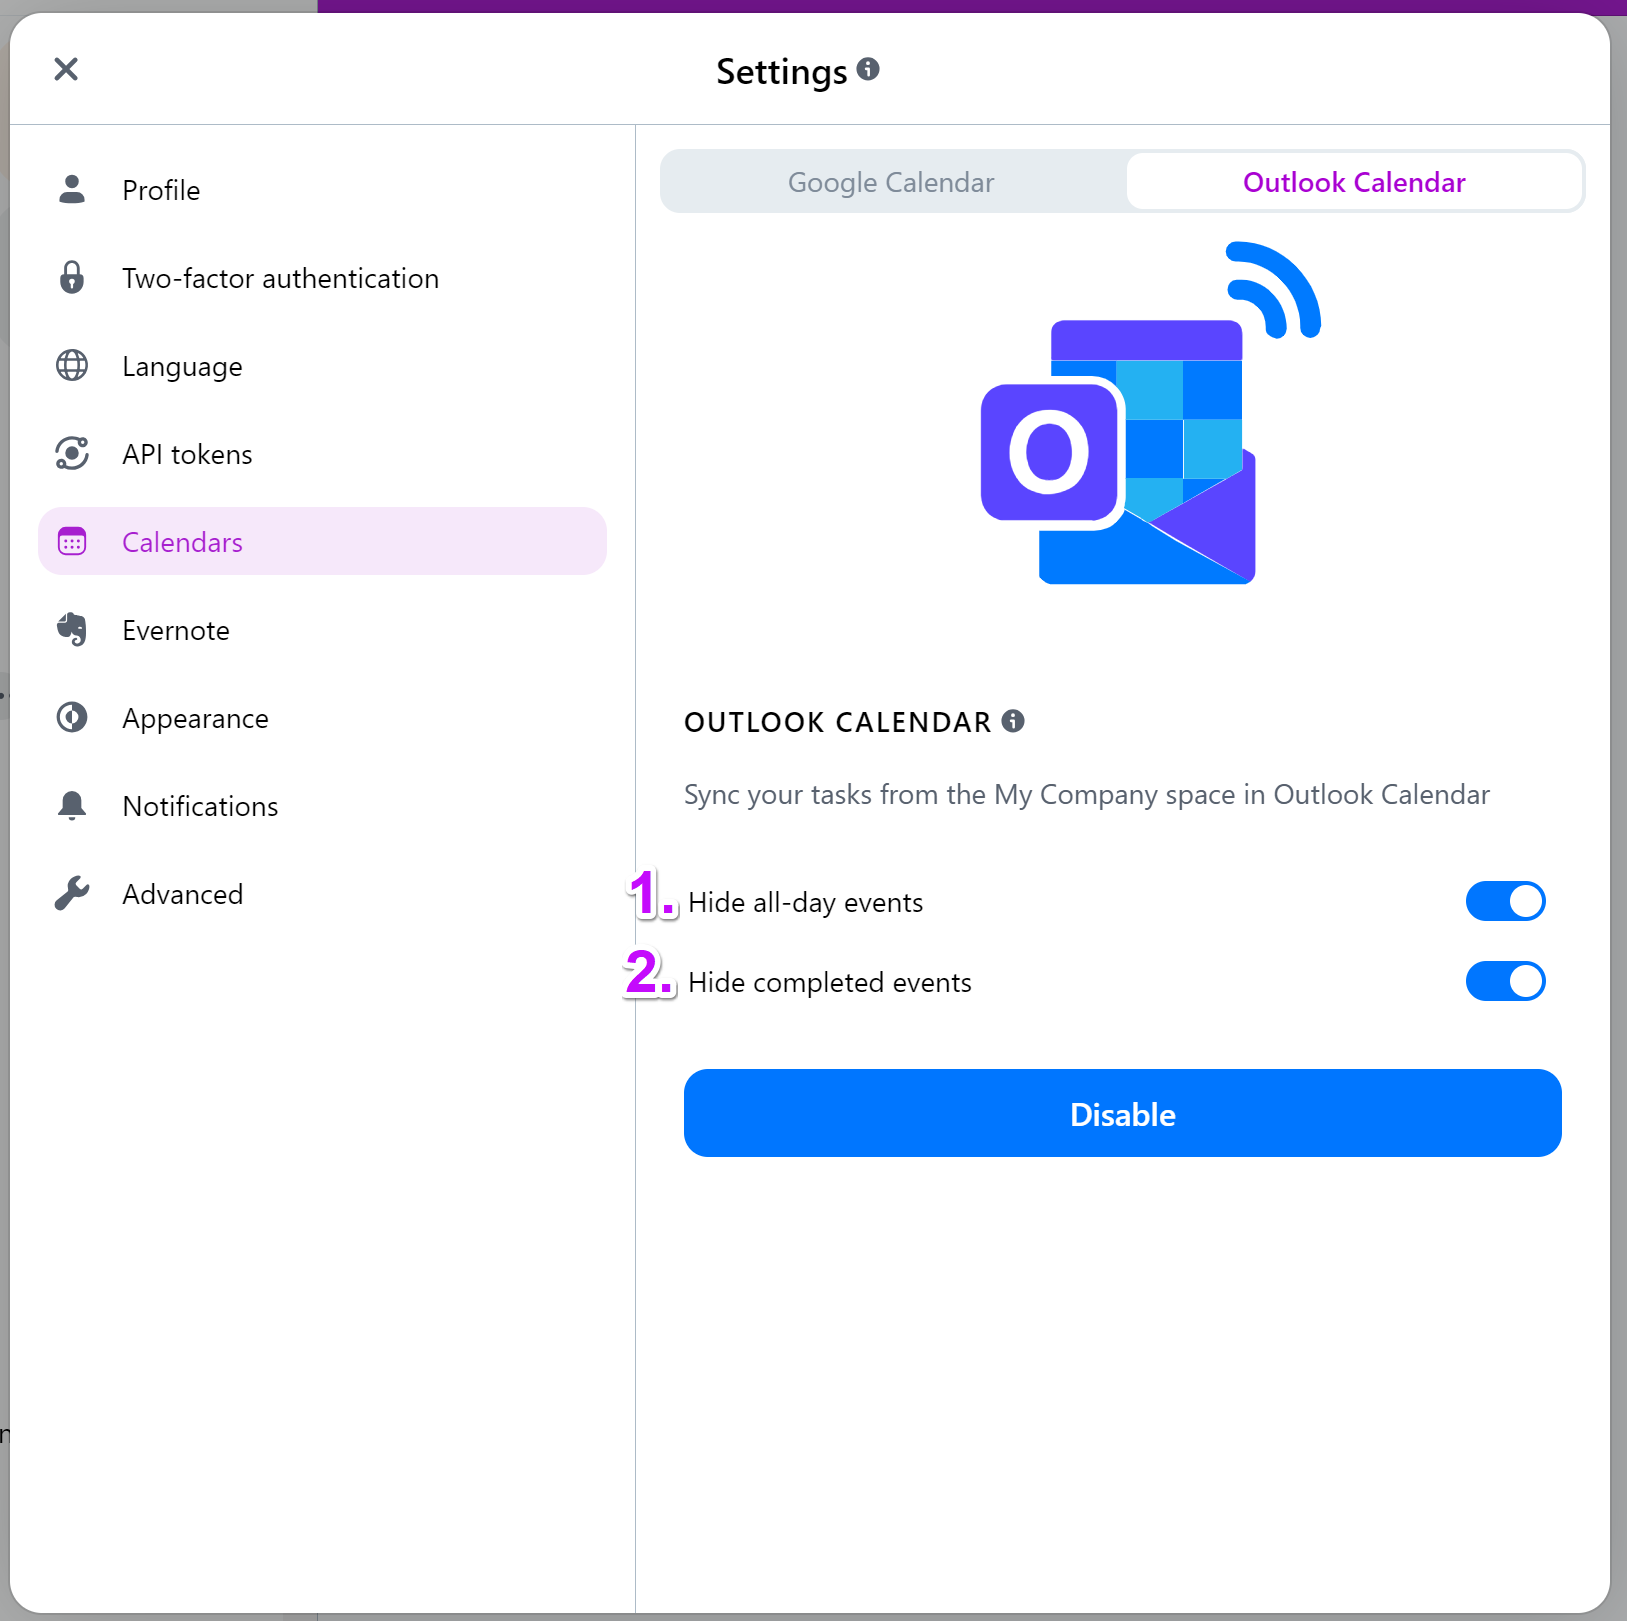
These two additional settings allow you to:
- Hide all-day events - by enabling this setting, you will no longer see all-day tasks (tasks with a due date that don’t have a due time set) from Nozbe in your Outlook Calendar.
- Hide completed events - when you enable this setting, Nozbe will stop showing you completed tasks from Nozbe in your Outlook Calendar.
Repeating tasks in Nozbe and Outlook Calendar
Nozbe and Outlook Calendar treat repeating tasks differently.
Nozbe holds just one active version of a recurring task, scheduled to the nearest occurrence date. It will show up in your Outlook Calendar as just one event with that date.
Once you complete that task, the next version of it with a new due date will re-create itself in Nozbe and will be synchronized to your Outlook Calendar the following day.
This means that apart from the next version of your recurring task scheduled to the nearest occurrence date, you won’t see future versions of it in your Outlook Calendar.
Time blocking
If you enabled time parameters in your project, you can add the “Time needed” and “Time spent” parameters to tasks in that project.
You can use the “Time needed” parameter in Nozbe to block time in Outlook Calendar. When you add the “Time needed” parameter to a task with a due date and time set, the Outlook Calendar event’s duration will be adjusted according to the parameter set in Nozbe.
Thanks to this, you can plan your day more efficiently, taking the planned duration of your tasks into account.
Disabling the integration
If you no longer wish to be using the Outlook Calendar integration, you can disable it in your Nozbe.
To do this, hit the gear icon → Settings → Outlook Calendar and press the “Disable” button. The integration will be disabled.
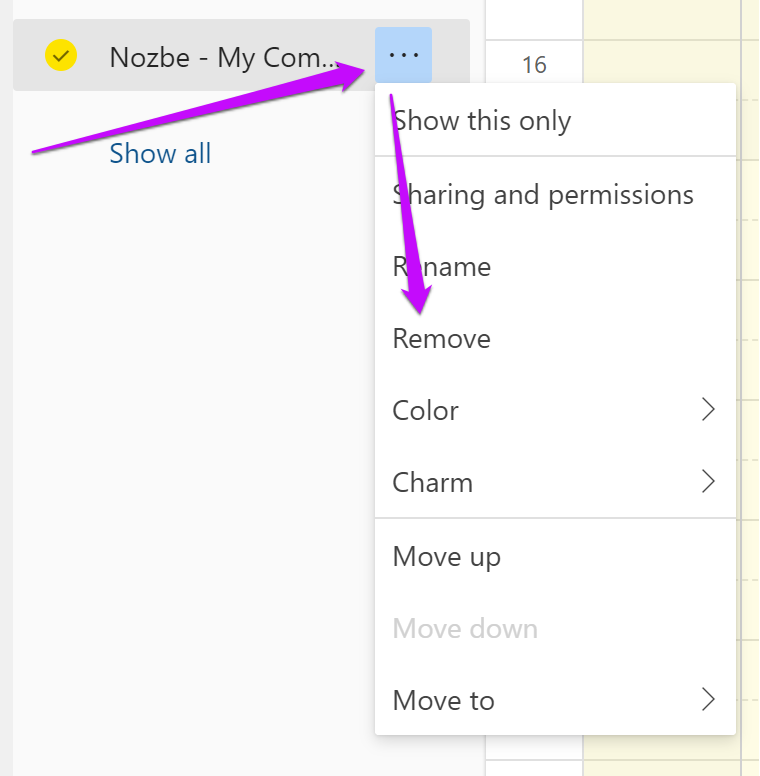
When you disable the integration, the synchronization between your Nozbe and Outlook Calendar will be stopped. However, the sub-calendar and all events within it that were synchronized before disabling the integration will remain in your Outlook Calendar. If you no longer wish to see that sub-calendar, you can remove it in your Outlook Calendar’s settings.