REST API
How to get your Nozbe API key
To generate your API token, hit the gear icon → Settings → API tokens and click “Add new token.”

You can add a new token there and name it, for example, “Nozbe API.” You can generate more tokens to use with different integrations/apps.
By default, the API tokens you add will give access only to the space you’re creating them in. If you want to add a token that gives access to all of your spaces, toggle the “Add it as a global token” option.
WARNING: do not share your API key with anyone! Your API key should remain private. If you showed it to anyone, it would be like giving your email and password away. If you share your API key or publish it somewhere, you risk leaking your data.
Use `apikey <API_token> as the Authorization header when accessing Nozbe Rest API.
How to use interactive API documentation
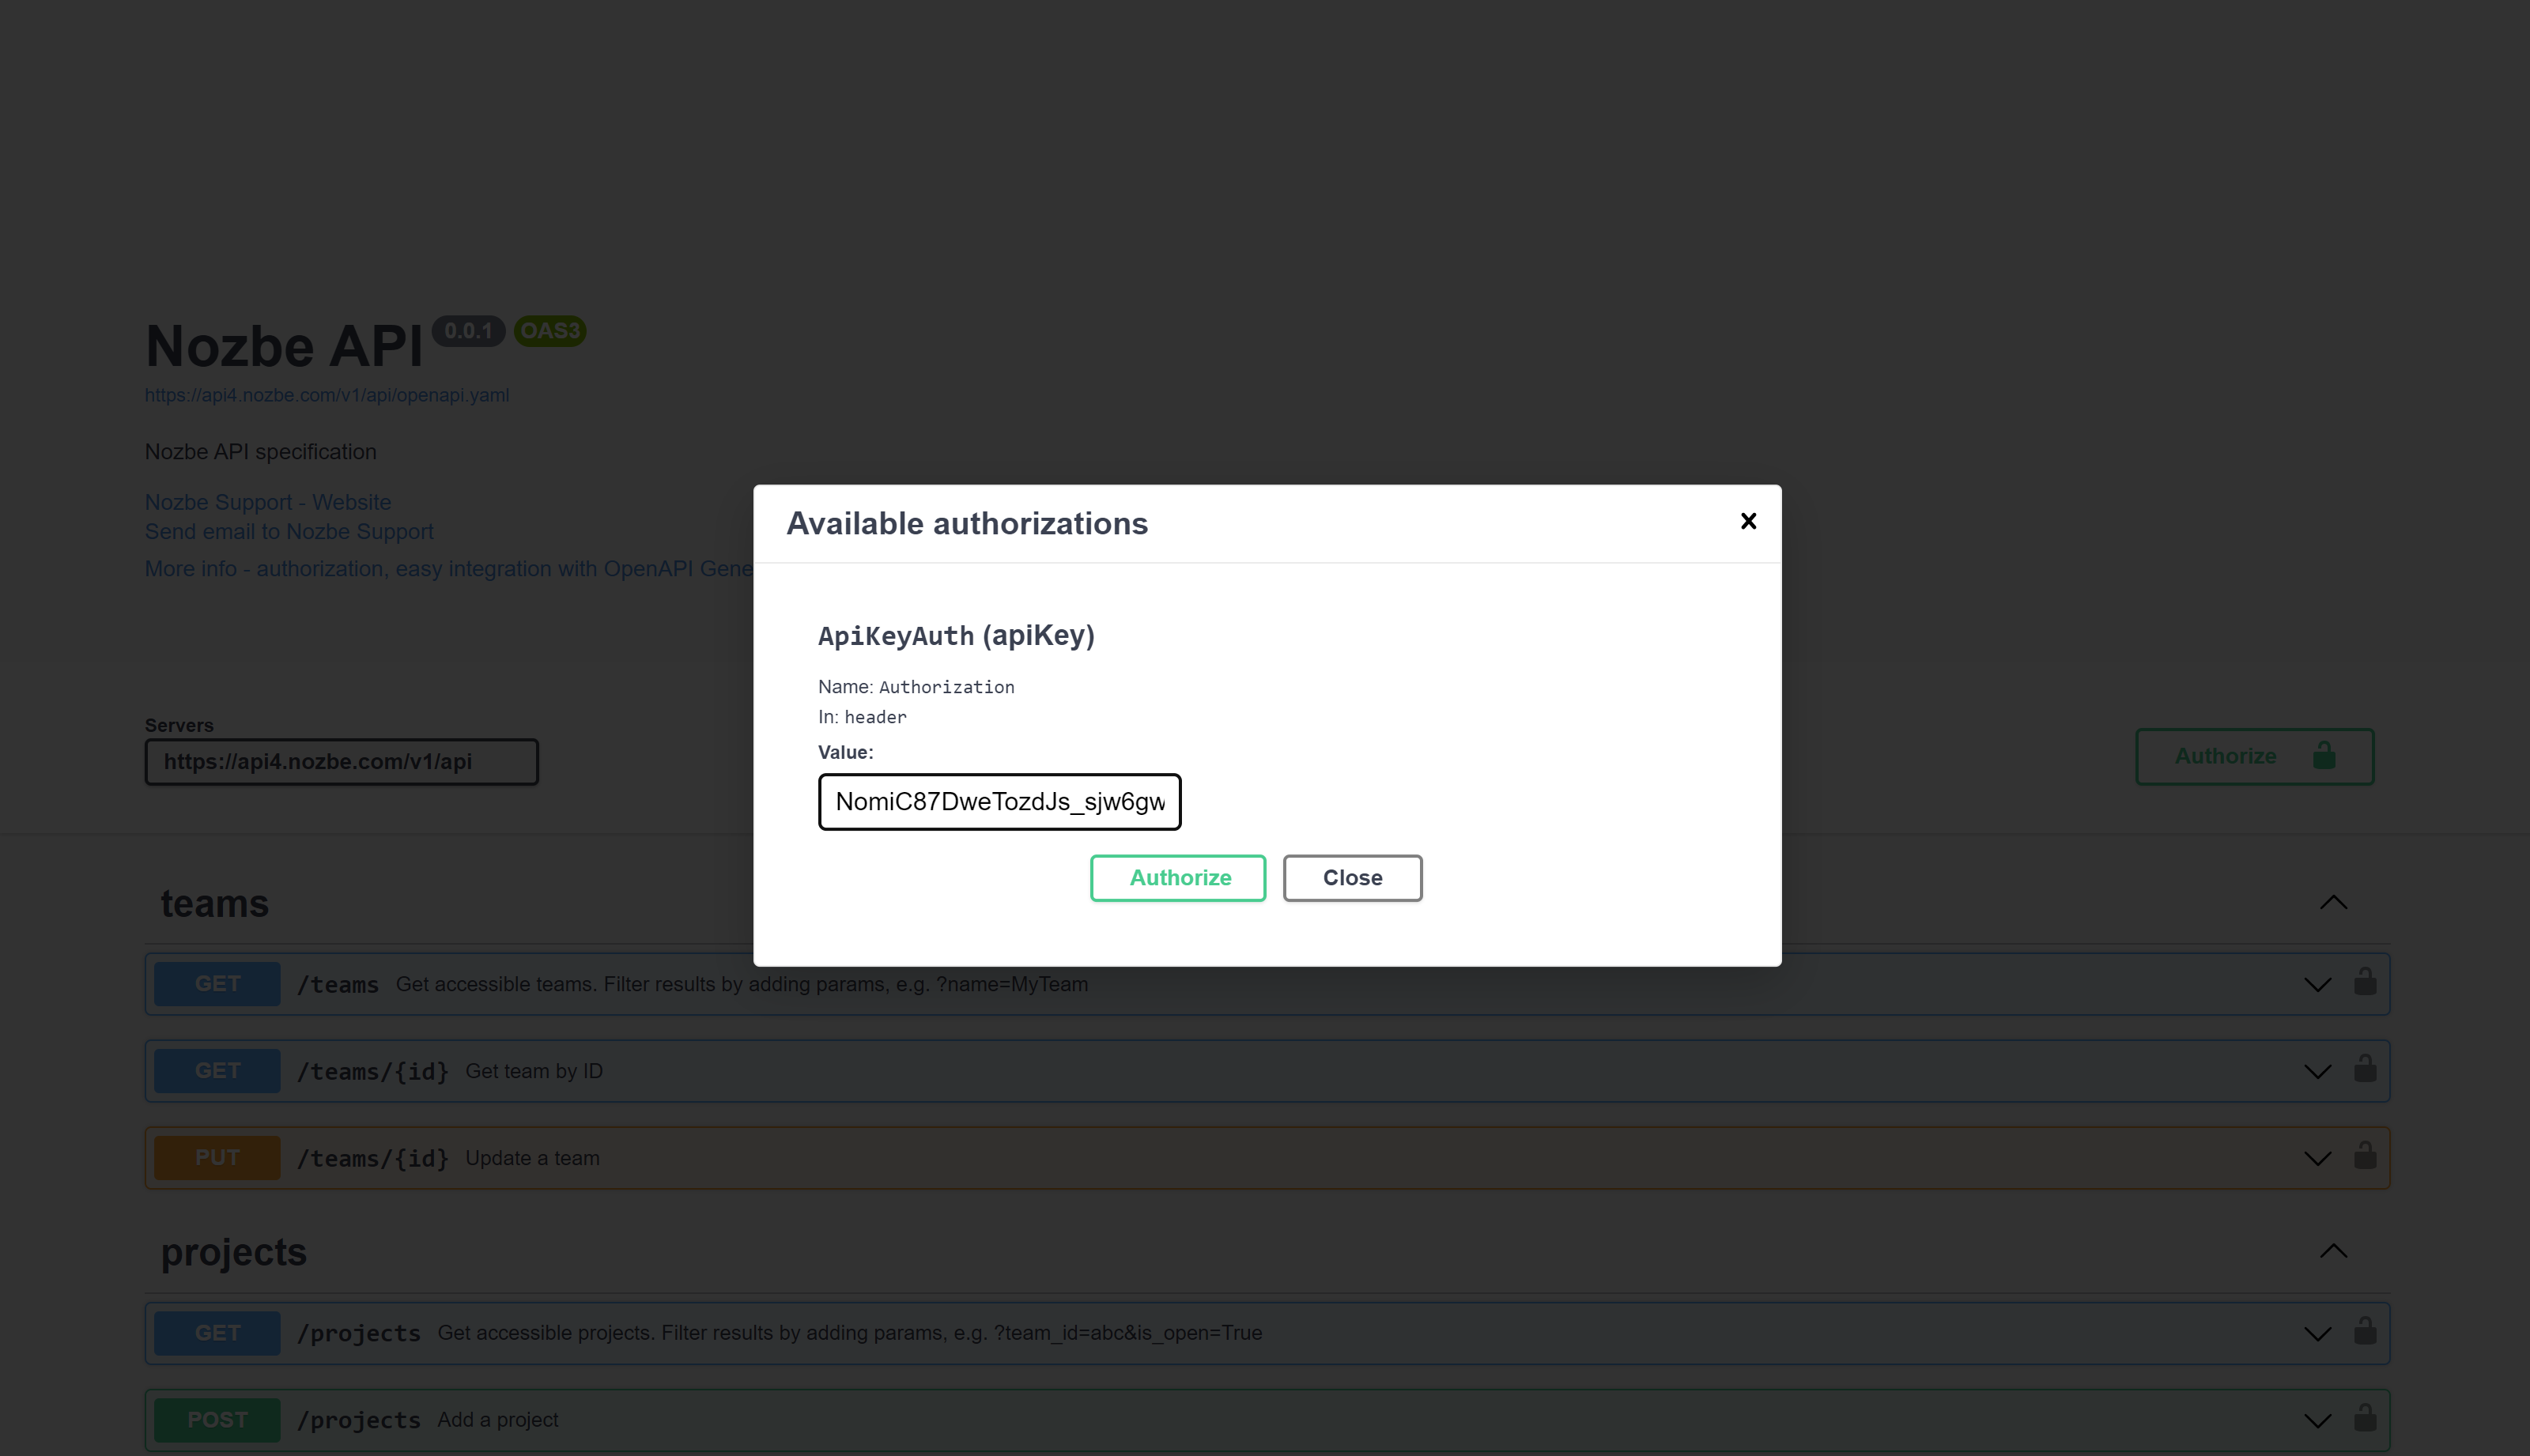
- Go to Nozbe API interactive documentation at https://api4.nozbe.com/v1/api
- Select Authorize and provide
apikey <API_token>
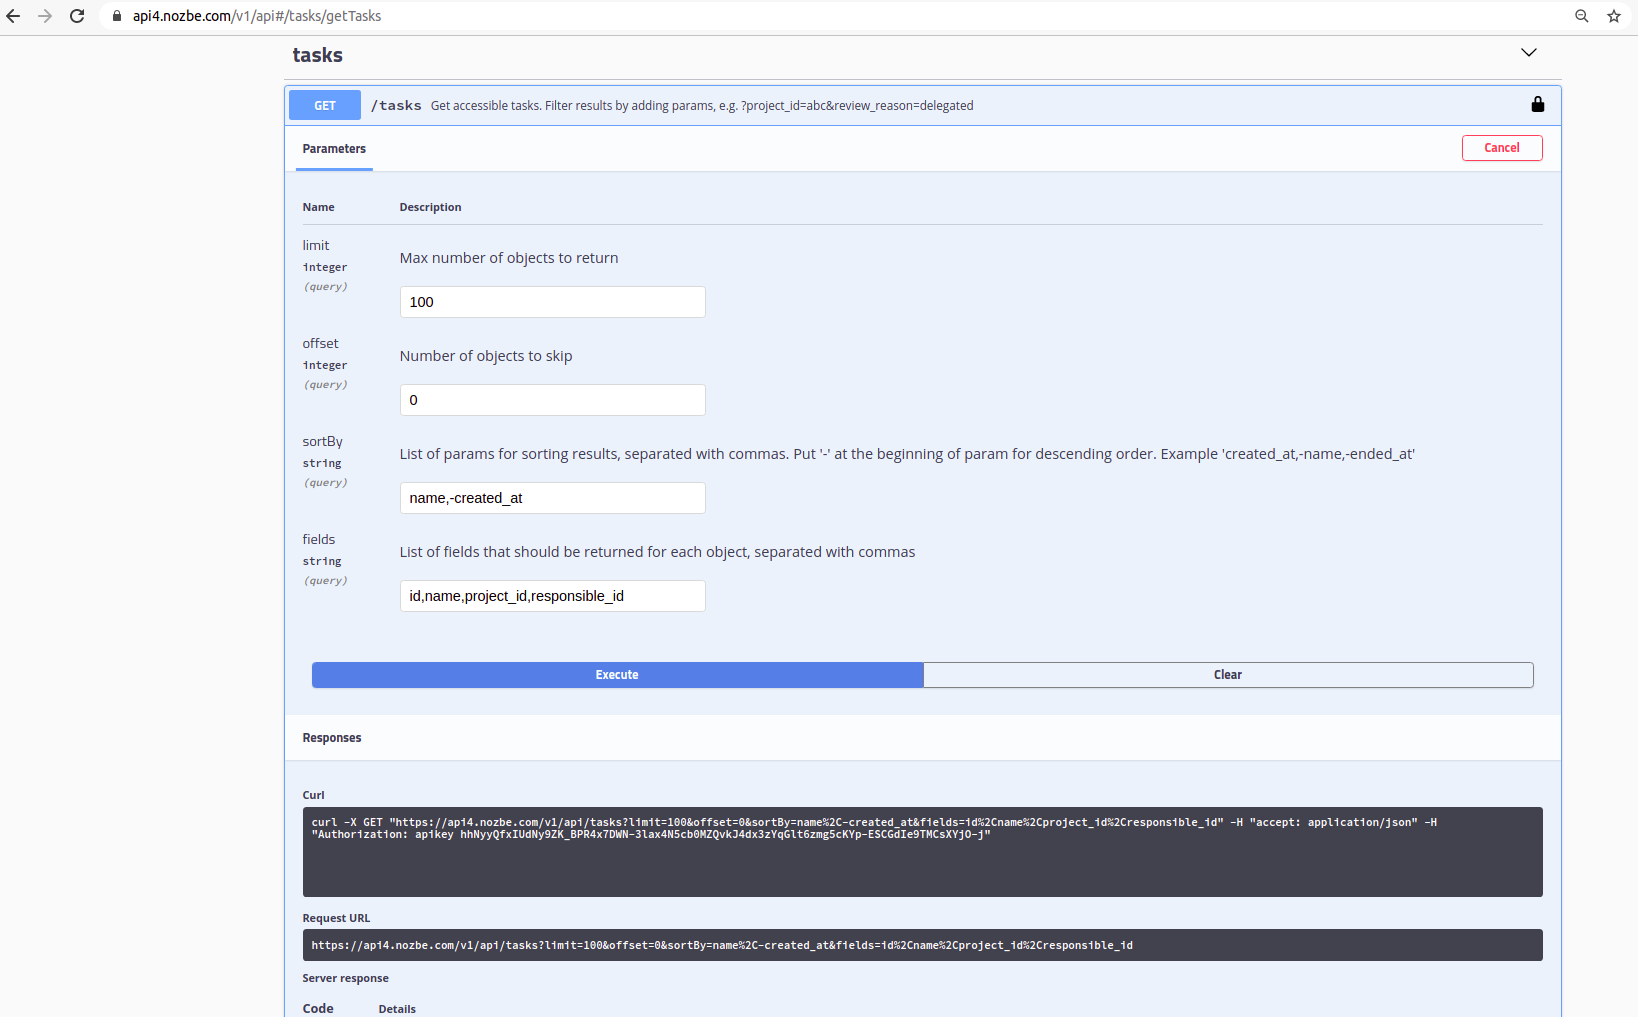
- Start using interactive API documentation by selecting “Try it out” on the endpoint and executing requests with
Execute.
How to use API - examples
- Performing requests to API
Requests can be performed on endpoints listed in the documentation. Each endpoint requires the API token to be provided as the Authorization header.
- Example: fetch all projects
curl -X 'GET' \
'https://api4.nozbe.com/v1/api/projects' \
-H 'accept: application/json' \
-H 'Authorization: <API token>'
- Example: create a task
curl -X 'POST' \
'https://api4.nozbe.com/v1/api/tasks' \
-H 'accept: application/json' \
-H 'Authorization: <API token>' \
-H 'Content-Type: application/json' \
-d '{"name": "My first task created via API"}'
- Filtering results
Results can be filtered by query parameters using LHS brackets. Supported operators are:
| Operator | LHS bracket |
|---|---|
| equal | [eq] (or nothing) |
| not equal | [ne] or [neq] |
| greater than | [gt] |
| greater then or equal | [gte] or [ge] or [min] |
| less than | [lt] |
| lest than or equal | [lte] or [le] or [max] |
- Example: get all favorite projects created since the beginning of 2023
curl -X 'GET' \
'https://api4.nozbe.com/v1/api/projects?is_favorite=true&created_at[min]=1672531200000' \
-H 'accept: application/json' \
-H 'Authorization: <API token>'
- Example: get all active priority tasks
url -X 'GET' \
'https://api4.nozbe.com/v1/api/tasks?ended_at=null&priority_position[ne]=null' \
-H 'accept: application/json' \
-H 'Authorization: <API token>'
- Filtering fields
With the fields query parameter you can limit object fields returned by server. Fields should be separated with commas. If not provided, all fields will be returned.
- Example: get only IDs and names of abandoned tasks
curl -X 'GET' \
'https://api4.nozbe.com/v1/api/tasks?is_abandoned=true&fields=id,name' \
-H 'accept: application/json' \
-H 'Authorization: <API token>'
- Sorting
Sorting the results can be achieved with the sortBy query parameter. You can provide multiple fields to sort by, separated with commas. For the descending sort order, use - before sort field.
- Example: get all projects sorted by name; if names are equal, sort by newest first
curl -X 'GET' \
'https://api4.nozbe.com/v1/api/projects?sortBy=name,-created_at' \
-H 'accept: application/json' \
-H 'Authorization: <API token>'
- Pagination
Query parameters limit and offset can be used to paginate results.
- Example: get all tasks sorted by the creation date. Split results into pages, each containing 10 tasks, and return 3rd page
curl -X 'GET' \
'https://api4.nozbe.com/v1/api/tasks?sortBy=created_at&limit=10&offset=20' \
-H 'accept: application/json' \
-H 'Authorization: <API token>'
How to generate API clients with OpenAPI Generator
Nozbe provides an OpenAPI 3.0 document at:
https://api4.nozbe.com/v1/api/openapi.yaml
Generating client code with OpenApi Generator (https://openapi-generator.tech/) can simplify integration with Nozbe API.
You can find the list of available client generators here:
https://openapi-generator.tech/docs/generators#client-generators
Exemplary Ruby integration with Nozbe API:
- Install OpenAPI Generator https://openapi-generator.tech/docs/installation/
- Generate client code with (“ruby” can be replaced with another available generator):
openapi-generator-cli generate -i https://api4.nozbe.com/v1/api/openapi.yaml -g ruby -o /tmp/test/
- If the
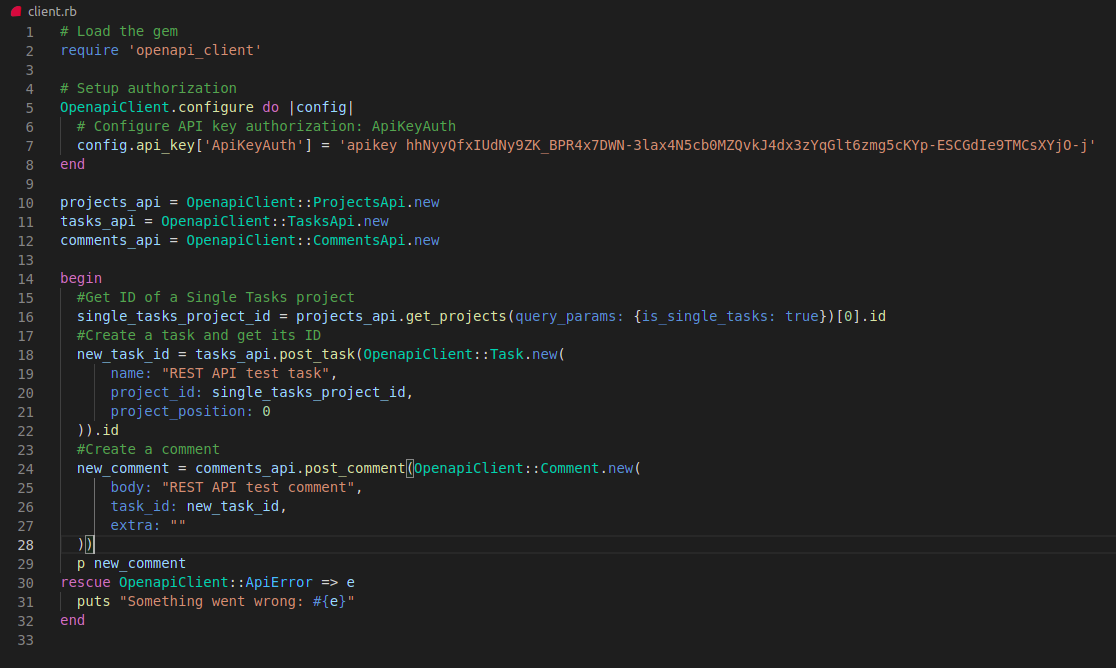
README.mdfile was generated, follow instructions from this file to compile and set up the client. Useapikey <API_token>as the Authorization header. You can now use generated client methods to communicate with the Nozbe server. Below is an example of using generated Ruby client methods to get a Single Tasks project and add a task and a comment.
Below you can see an example of using the generated Ruby client functions to get the “Single tasks” project and add a task with a comment: