Zapier Integration
How to Enable Integration with Zapier
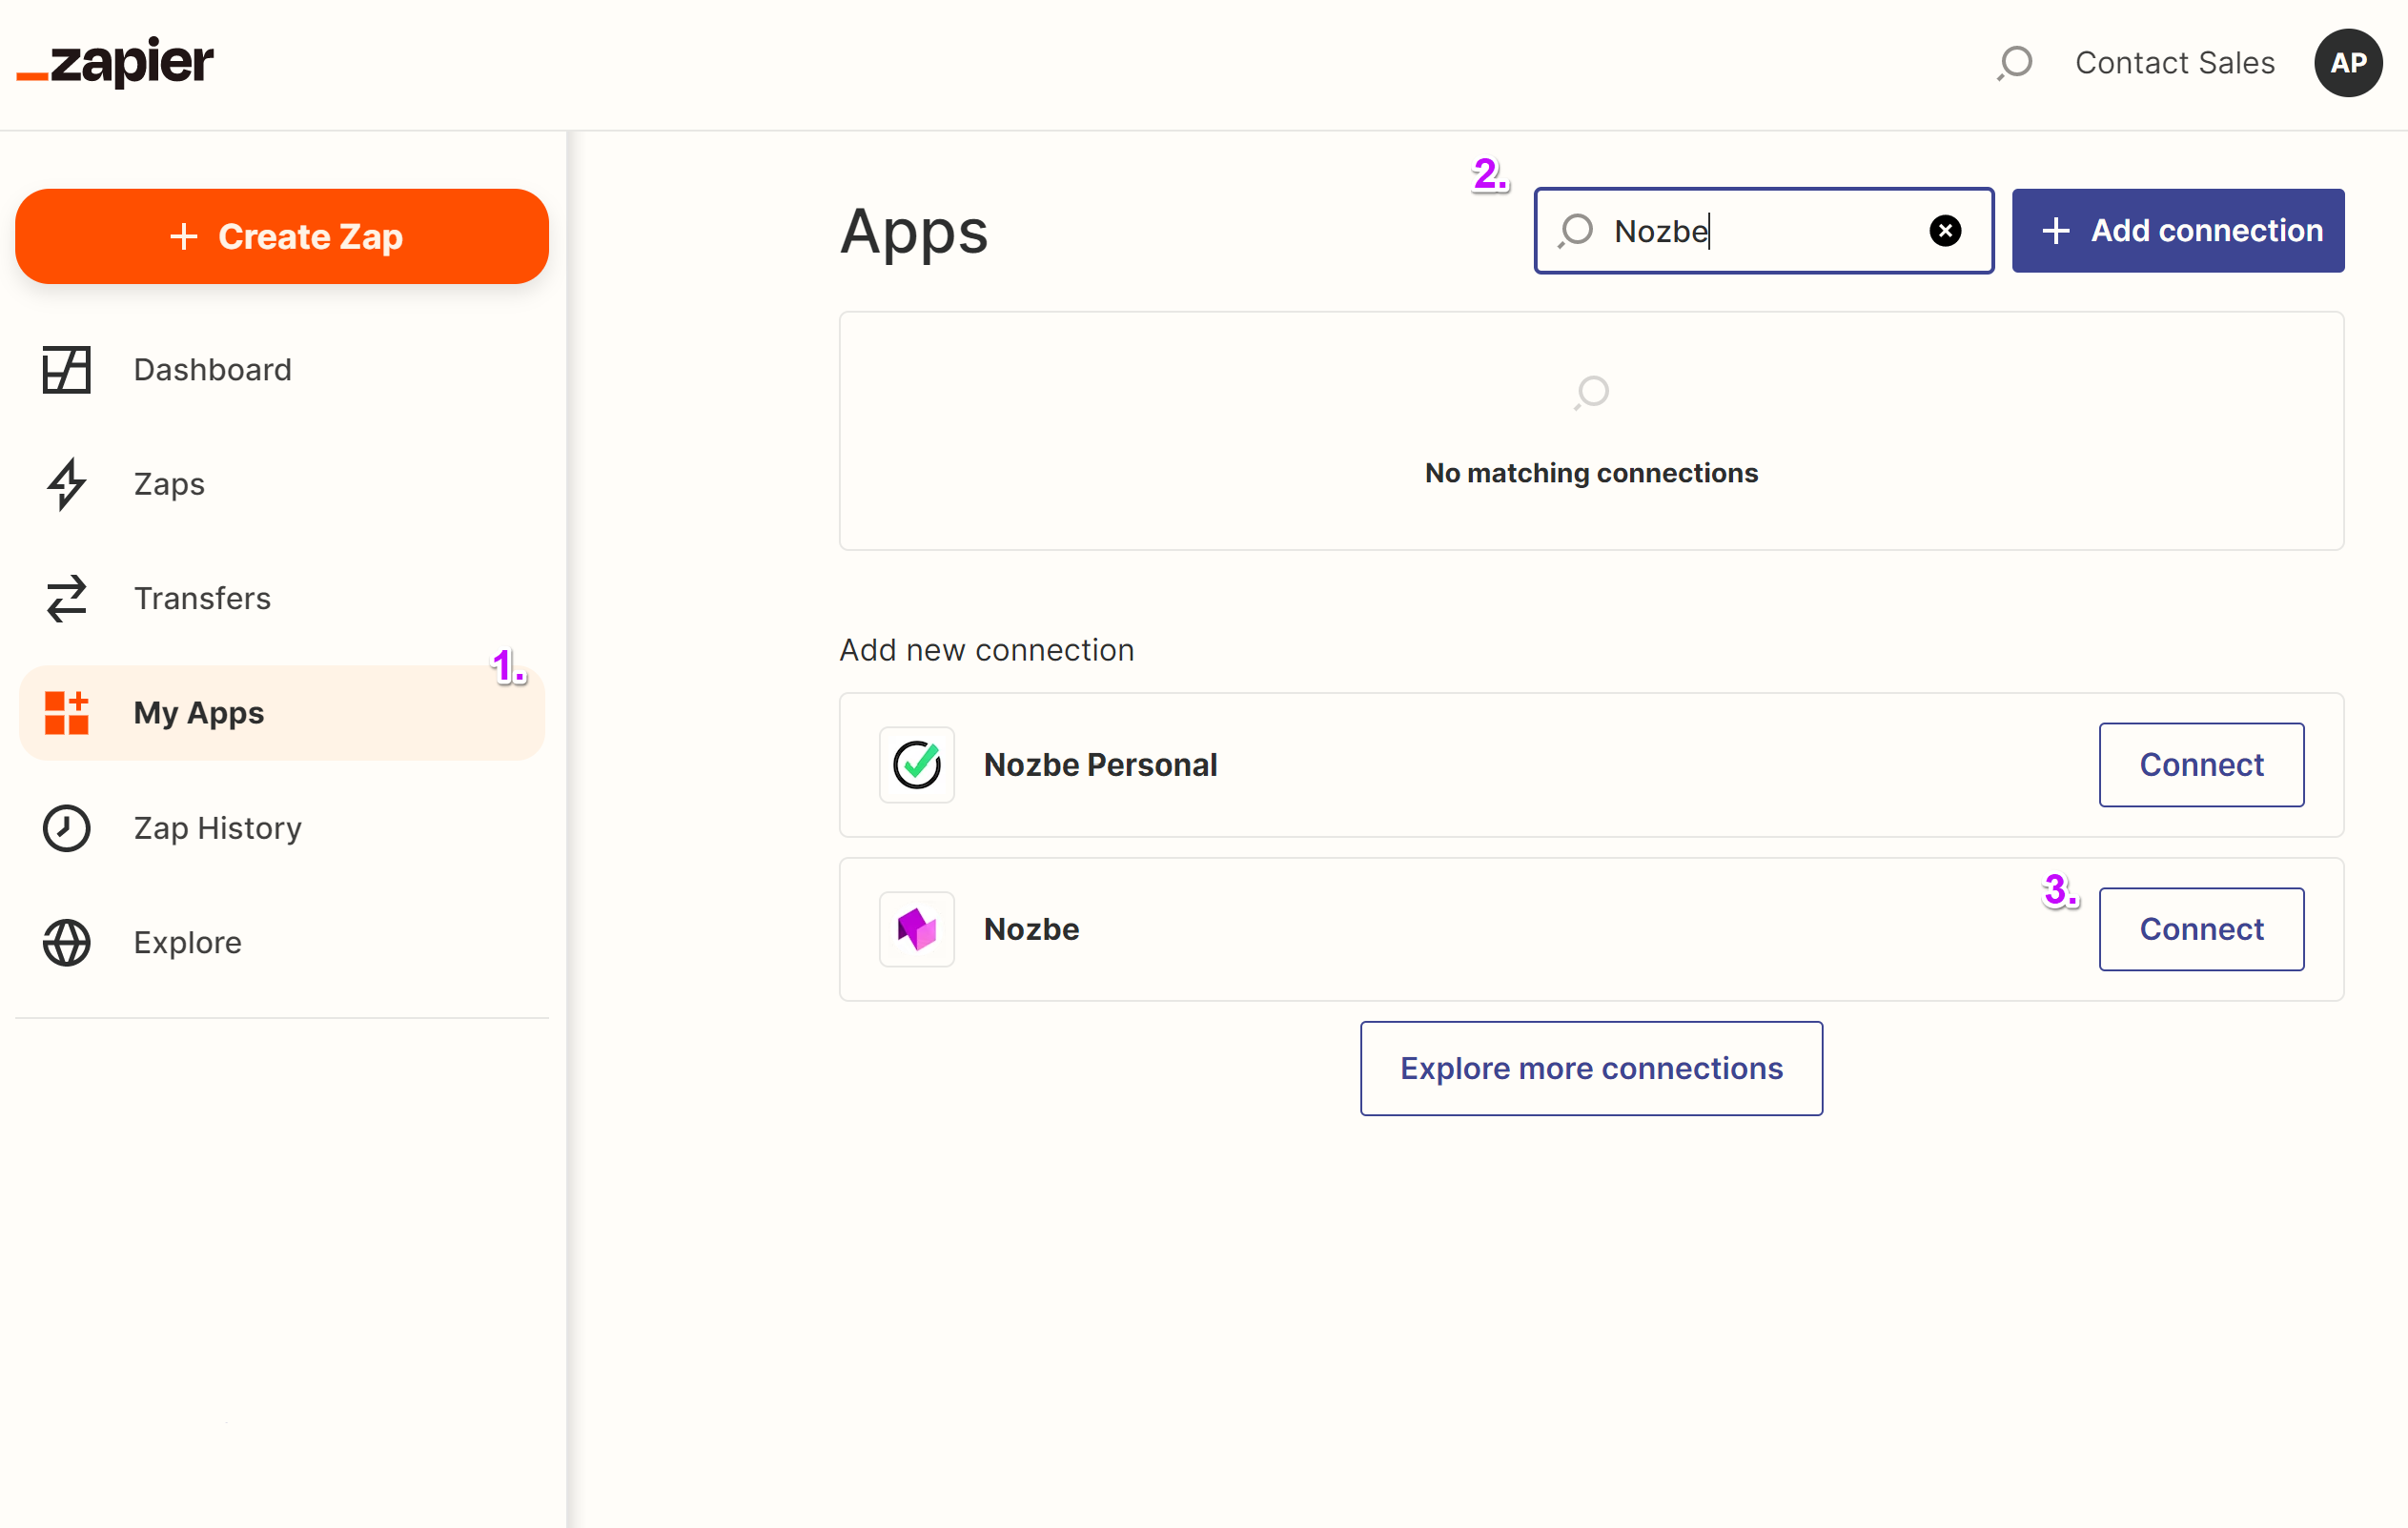
First, you have to connect a Nozbe account to Zapier.
To do so, open your Zapier account, choose the “My Apps” section, and then search for Nozbe.
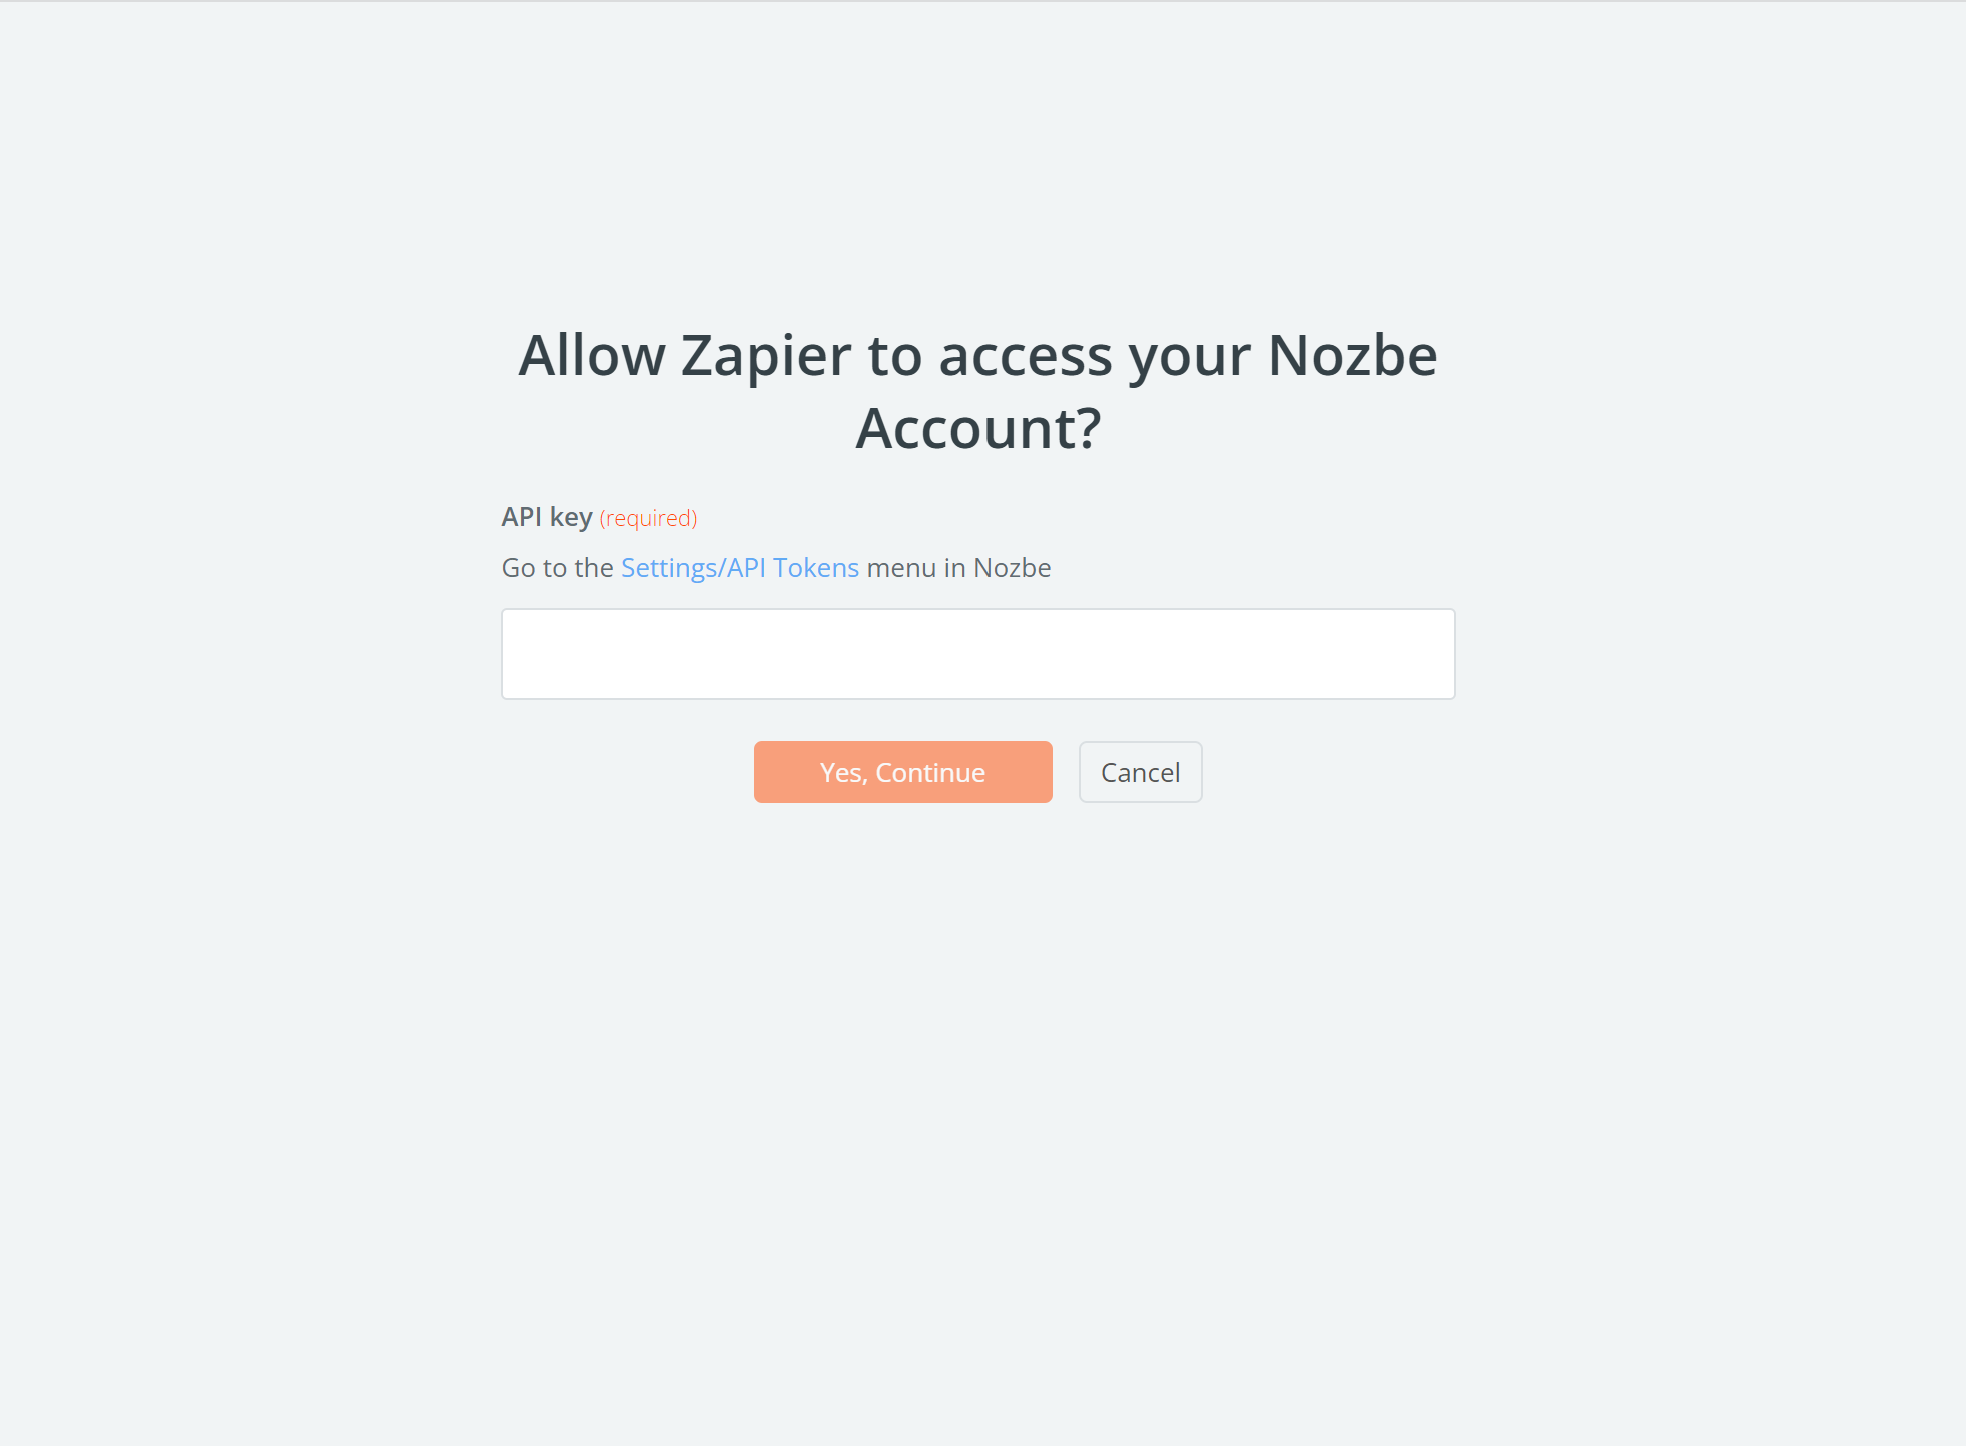
Next, you’ll be asked for your Nozbe API token.
How to get your Nozbe API key
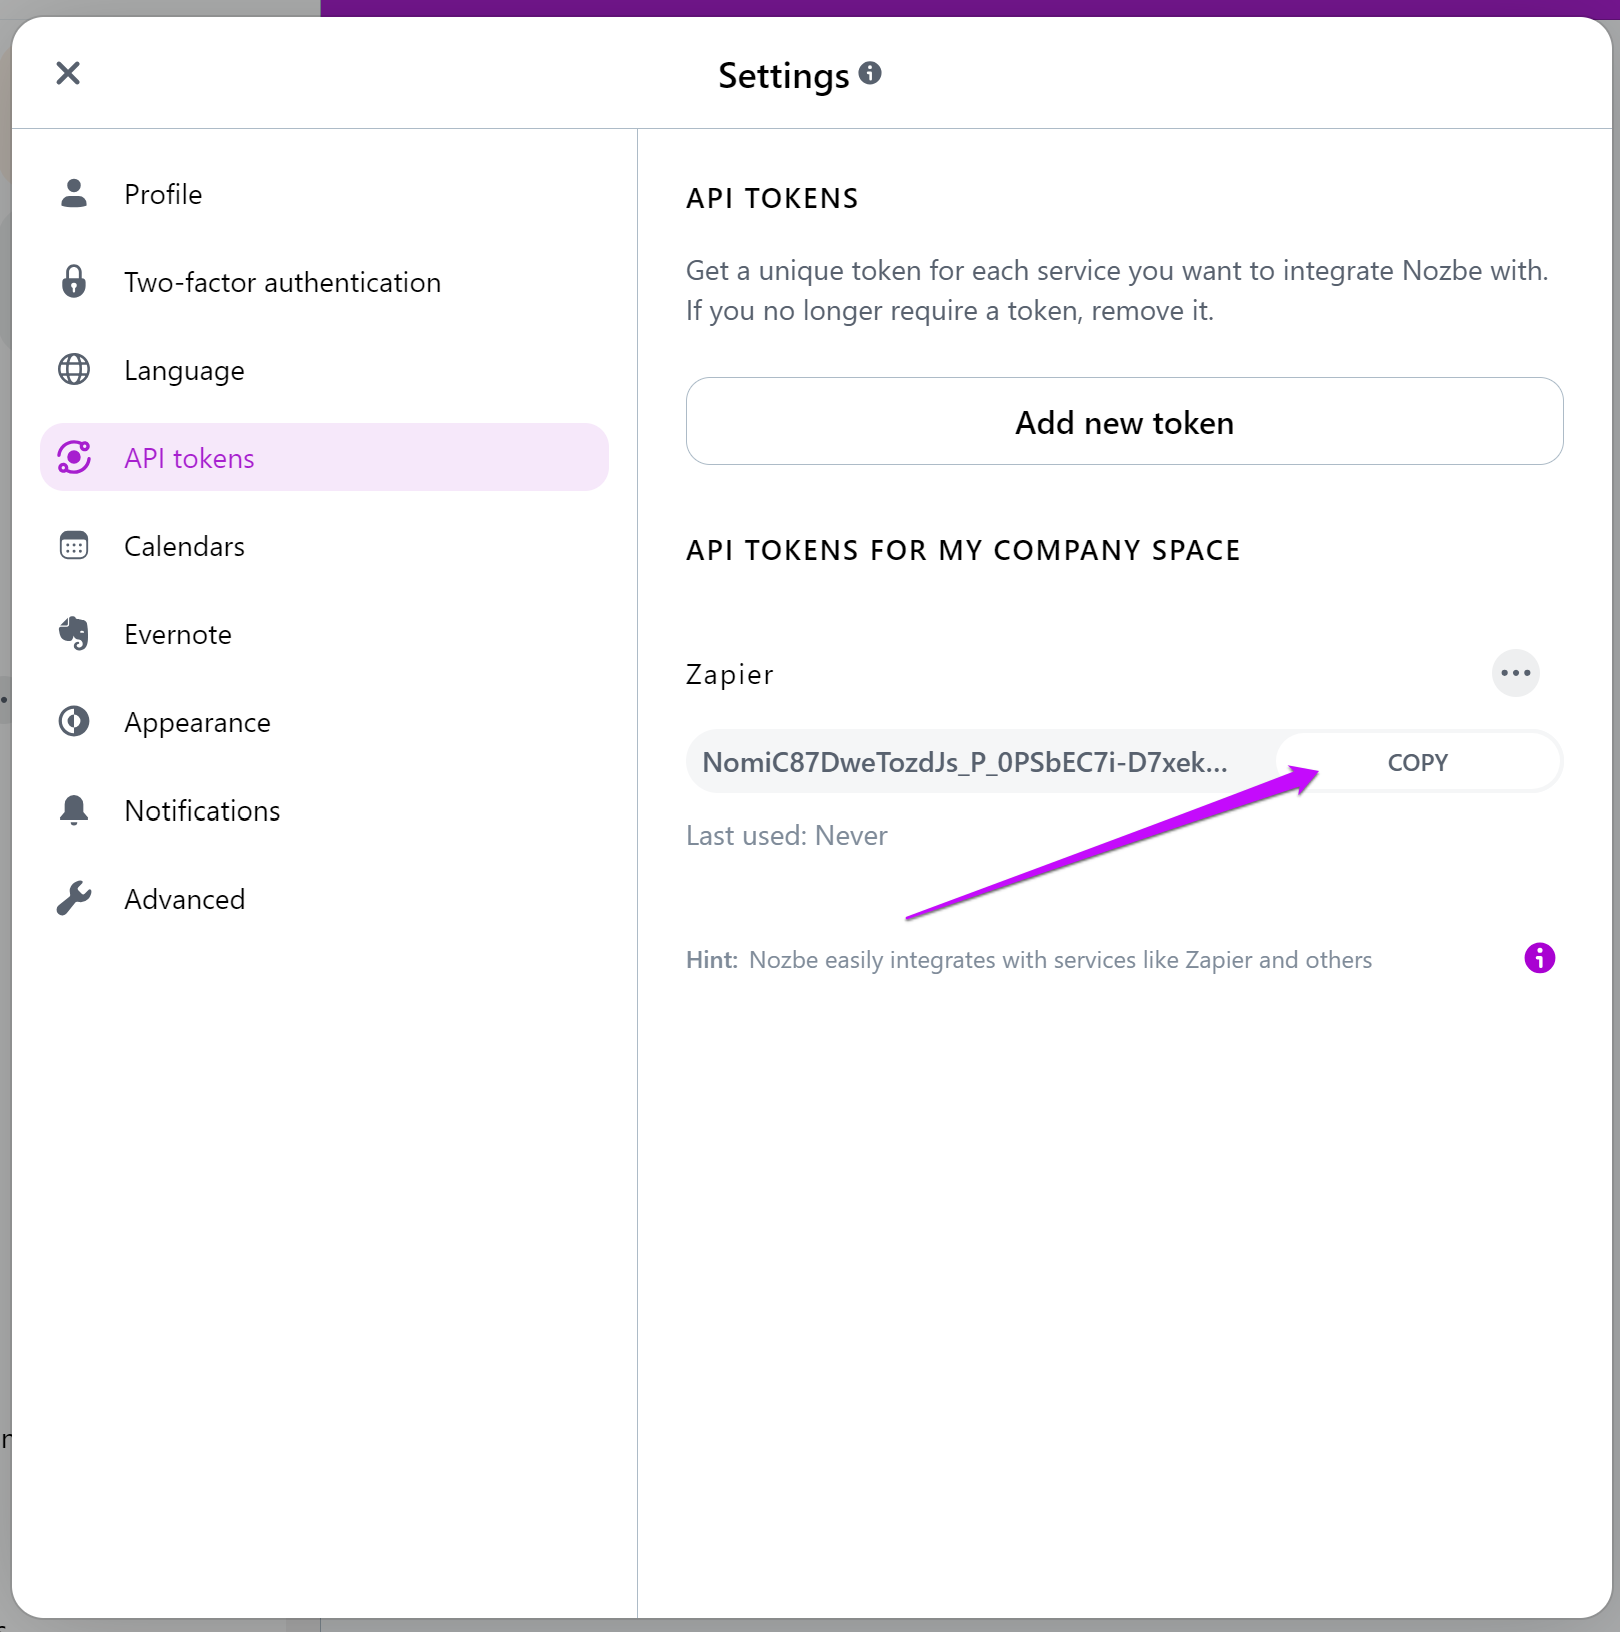
To generate your API token, hit the gear icon → Settings → API Tokens and click “Add new token.”
Just type Zapier to generate your unique API key for Zapier in Nozbe:
Now tap on the “Copy” button to copy your API key and use it to create Zapier integration:
Now go back to the Zapier window, paste your API key, and click the “Yes, Continue” button.
Now you should see the newly created Nozbe integration in your “My Connections” section in the Zapier account.
How to create your first Zap?
What is a Zap?
A Zap is an automated workflow that connects your apps and services. Every Zap consists of a trigger step (“when this happens…") and one or more action steps (“then do this…"). When you turn your Zap on, it will run the action steps every time the trigger occurs.
How to Create a New Zap?
Go to your Zapier account, hover over the left sidebar menu and click “Create Zap.”
Now you have to think about what action you want to automate. You can, for example, connect Nozbe and Slack. For instance, you want to be notified in Nozbe when someone creates a new Slack channel.
1. Set up your trigger
Select Slack as a trigger app. An event that occurs in Slack will trigger your Zap.
Then choose your trigger event: creating a new channel. This will be the action that triggers your Zap.
Select or connect Slack account. Otherwise, you won’t be able to use it in the Zap trigger.
Test your trigger now before continuing to the next step.
2. Set up your action
Select Nozbe as an action app. The Zap will perform an action in Nozbe when it’s triggered.
Then choose your action event: create a task in Nozbe, e.g., in your Single tasks view.
Select or connect the Nozbe account. If you want to use Nozbe in your Zap, you need to do that.
Test your Zap now to see if it works correctly. When your action is set up successfully, a green checkmark icon will appear in the top left of the step.
3. Name your Zap
This Zap will be added to your Zap list. Choose a name that will help you identify it on your dashboard.
You can add a name and a description.
4. And last but not least- Turn on your Zap
Tap on the switch when you finish your Zap to turn it on. It will become active, and you will be able to use it :)
Here you can find our Zap example:
Other Zap Examples for Nozbe
Connect Dropbox and Nozbe
This Zap connects your Dropbox account with Nozbe. When you create a new file in a specific folder in your Dropbox account, Zap will add a new task to Nozbe with a direct link to that file in a comment.
Connect Twitter and Nozbe
This Zap creates a new task in Nozbe when someone mentions a User on Twitter or uses a specific hashtag. In this example, we used @nozbe mention.
You can check it here:
Connect Nozbe Personal and Nozbe
This Zap adds a new task to your Nozbe whenever a new task is created in a specific project in Nozbe Personal.


